All-in-One: VS Code for Economists
February 10, 2025
Introduction
Recently, new tech tools, including GenAI models, have emerged almost daily, and many professions have quickly integrated them into their workflows. Economists who also work with data-intensive research and computational models have a great opportunity to do the same.
Right now, many of us rely on multiple tools—Stata for data management, Overleaf for LaTeX, separate terminals for Git, and a separate GenAI tool for other tasks. While each tool is useful, constantly switching between them can slow down research.
This guide is here to help Economics researchers make their workflow more efficient by using VS Code as an all-in-one platform. By bringing data analysis, coding, LaTeX writing, version control, and GenAI into one place, we can spend less time switching tools and more time focusing on research.
VS Code Installation
To download VS Code, visit the official website and follow the installation instructions for your operating system (Windows, macOS, or Linux).
Installing Extensions
1. VS Code Functionality:
- GitHub Copilot: This extension provides AI-powered code suggestions and completions. Please follow the steps below to install it:
- Open VS Code.
- Go to the Extensions view by clicking on the Extensions icon in the Activity Bar on the side of the window or by pressing
Ctrl+Shift+X. - In the search bar, type “GitHub Copilot” and press Enter.
- Find the GitHub Copilot extension in the search results and click the “Install” button.
- Writing Correction Tools: I used to use Grammarly, which worked well on VS Code, but they discontinued their extension. There are other alternatives, including LanguageTool (which I currently use) and Revision. You can install LanguageTool by following the steps above.
- Markdown: Markdown is a plain text formatting syntax that allows you to write in an easy-to-read and easy-to-write format, which can then be converted to HTML or other formats. VS Code has built-in support for Markdown, but you can improve your experience with additional extensions like “Markdown All in One”. To install it, follow the same steps as above.
There are many other extensions that can improve your VS Code experience and productivity, but these are the ones I use the most.
2. Data Analysis: I used to rely on RStudio for data analysis, but now I prefer a combination of Python and R. Python, in particular, feels more productive for my workflow. During the data exploration stage, I find the Jupyter Notebook to be especially useful.
Python: If you have Python installed on your computer, you can integrate it into your VS Code by installing the Python extension pack from here. After installation, you can easily switch between different Python interpreters (such as conda environments) by opening the command palette (Ctrl+Shift+P) and selecting “Python: Select Interpreter.”
R: To achieve a similar all-in-one experience as RStudio, you can install the R extension for VS Code. I followed the instructions provided here to set up R in VS Code. The first time you run it, you might encounter an issue where the R terminal stops or fails to execute the code. This is likely due to a conflict, which can be resolved by following the troubleshooting steps outlined here.
Jupyter Notebook: The Python extension also includes support for Jupyter Notebooks. You can create, edit, and run
.ipynbfiles directly in VS Code.Data Wrangler: You can download Data Wrangler from the marketplace here. This extension allows you to visualize tabular data directly within VS Code. It is a great tool for quick data exploration and analysis.
For optimization tasks, I use MATLAB. I prefer using its regular IDE over VS Code due to its superior debugging options and other features that are more robust compared to those available in VS Code for MATLAB. For those who prefer Julia for their optimization tasks, I have relatively little experience with it, but you can refer to the QuantEcon documentation for a guide on how to set it up in VS Code.
Although I haven’t personally used Stata in VS Code, you can refer to Paul Goldsmith-Pinkham’s Substack post here for a detailed guide on how to set it up.
3. LaTeX:
- LaTeX Workshop: This extension offers a set of tools for working with LaTeX documents, including syntax highlighting, code completion, and PDF preview. To install it, follow the instructions
here. I’ve been using this extension for almost two years, and I recall it took some time to set up a bug-free environment. The issues were mainly due to conflicts between the extension and the pre-installed LaTeX distributions on my computer. You might experience some bugs, but you can usually resolve them by checking the
.outfiles and error messages.
Setting Up Your Workspace
A workspace in VS Code is a collection of folders and files that you work on together. It is useful for both solo and collaborative projects. For collaborative projects, sharing the workspace with your collaborators ensures everyone sees the same files and folders, resolving the issue of separate directories for different users.
A workspace can be either a single folder or a multi-root workspace. A multi-root workspace is a collection of multiple parent folders that you can work on together. I haven’t tried using multi-root workspaces yet, as my projects typically are located in a single parent folder. If you want to learn more about multi-root workspaces, you can check the official documentation here.
To create a single-folder workspace, follow these steps:
- Open VS Code.
- Click on the “File” menu in the top-left corner.
- Select “Open Folder…” from the dropdown menu.
- Choose the folder you want to open as your workspace and click “Select Folder.”
Once your workspace is set to the folder you opened, you don’t need to set the directory starting from “Users/username/…” in your code scripts. For example, if you have a folder named “effort-project” with a subfolder named “code” and another subfolder named “data,” you can directly call the data files in your code scripts as follows:
library(readr)
data <- read.csv("data/data.csv")
If you want to open a new project folder, you can create a new VS Code window and open the new folder as explained above.
Data Analysis
In this section, I will cover using Jupyter Notebook for data analysis.
Creating a Jupyter Notebook:
- Open VS Code.
- Open the command palette by pressing
Ctrl+Shift+P(Windows/Linux) orCmd+Shift+P(macOS). - Type “Jupyter: Create New Blank Notebook” and select it.
- Choose the Python interpreter you want to use for the notebook. I use a conda environment for my data exploration.
Install and View Data: VS Code does not have a built-in data viewer like RStudio. However, I use the Data Wrangler extension to view data as a table, and I think it is great, as shown in the figure below.
To view data/variables:
- Install the Data Wrangler extension.
- Click on “Jupyter Variables” in the bottom panel to see the data/variables in your environment. You can click on the icon next to the variable name to view the data as a table.
The Data Wrangler will show you the type of each variable (a # for numeric and a 🄰 for character) and a quick histogram of the variable.
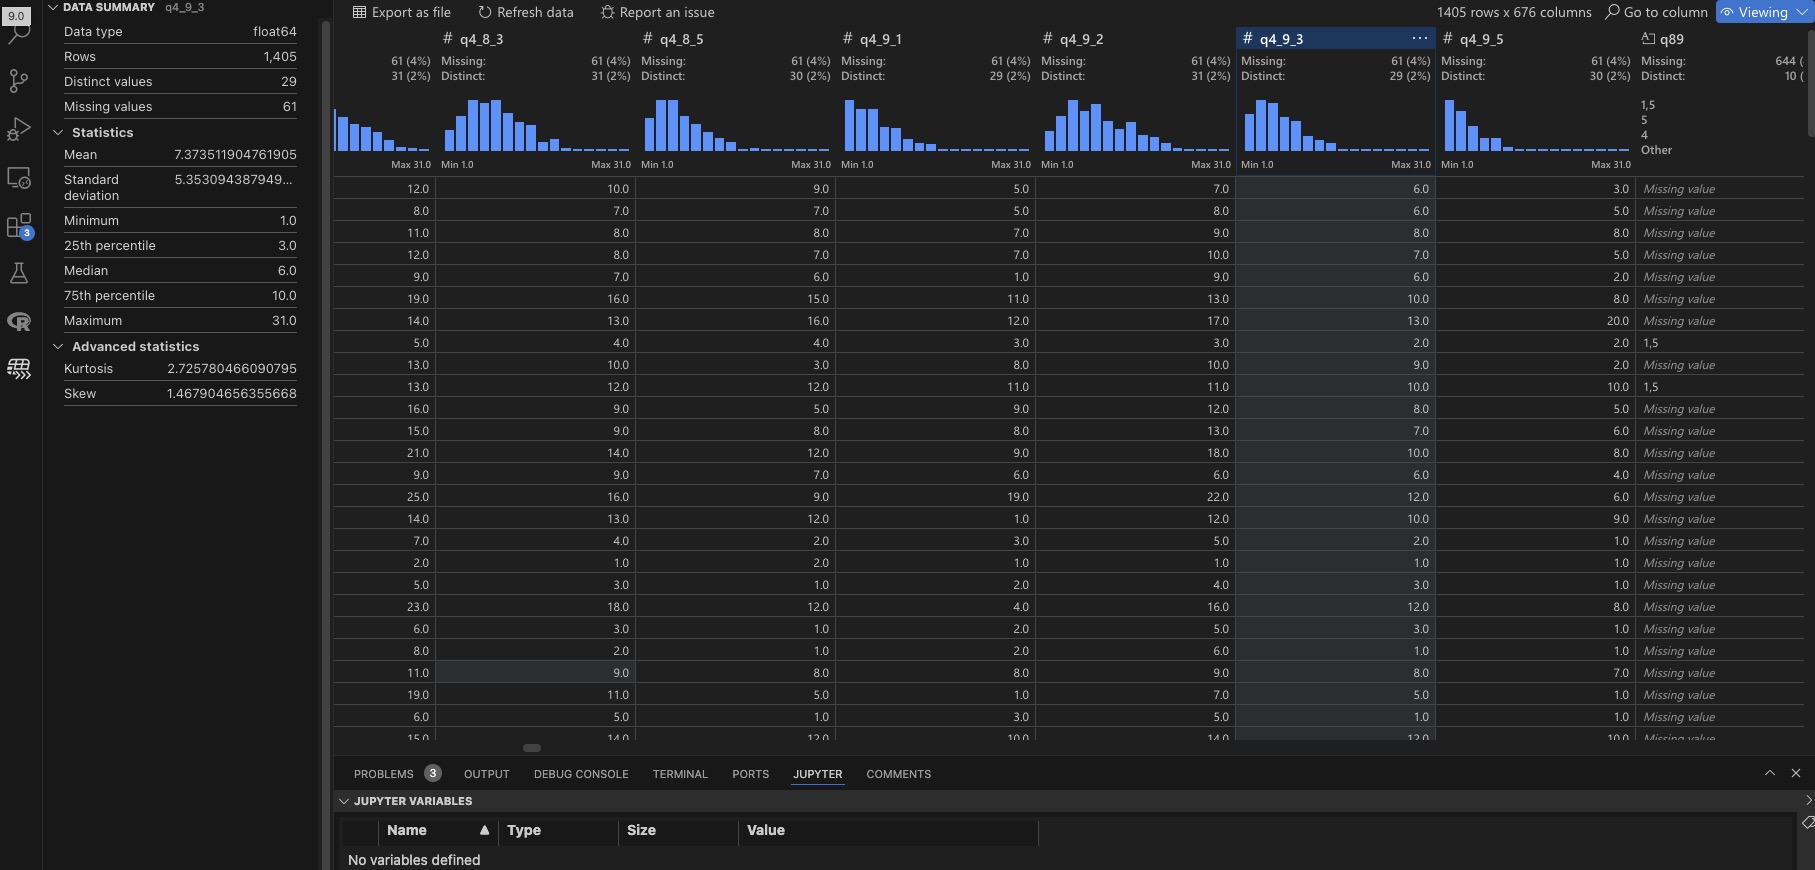
Figure 1: Sample Tabular Data Displayed in Data Wrangler
Debugging: Debugging a Jupyter Notebook is similar to debugging a regular Python script. You can set a breakpoint in a cell by clicking on the left side of the cell and run the cell with the debug option. Additionally, you can use the debug console to inspect the values of the variables.
LaTeX Writing
1. Offline Availability Overleaf is great for collaborative writing, but I recently prefer using it much less since I find Overleaf compilation both slow, and I prefer an offline experience in which I can connect to other local environments easily. Many economists might review their presentation slides on flights to conferences. Working offline allows for quick edits or bug fixes.
2. Dropbox Sync Before moving to VS Code LaTeX, let’s establish how to work on a collaborative project without Overleaf. Suppose you’re working on a collaborative project on Overleaf but want to update it locally. With an Overleaf premium account, you can synchronize your projects to Dropbox, which will appear in your Dropbox/Apps/Overleaf/. Your active code directory and the LaTeX directory may not be in the same parent folder, but you can still export your tables/figures to your tex directory smoothly.
3. Zotero Automation Suppose you search for an article on your browser and want to add it to a project library on Zotero, which you can do with a browser extension. (The Firefox extension works much better—free from bugs—than the Safari extension, in my case.) If you have already exported your library to a .bib file, then your .bib file will automatically be updated. Suppose this bib file is already added in your main.tex file; citing a new paper is pretty simple with two steps: just add it to Zotero on your browser and then go to your tex file and cite it. Relevant screenshots can be found below. The first figure shows adding the paper to Zotero, the second shows the Zotero library, and the third shows the automatic export. To adjust settings, go to Zotero->Preferences->Better BibTex.
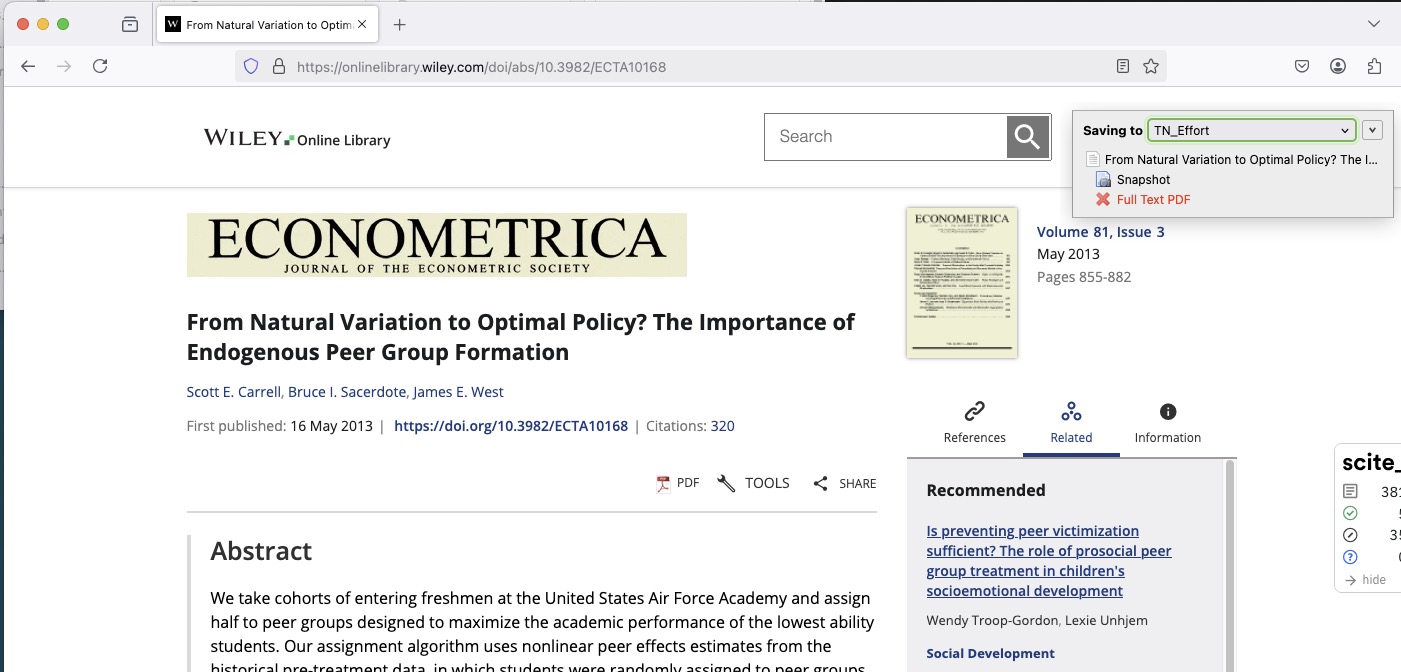
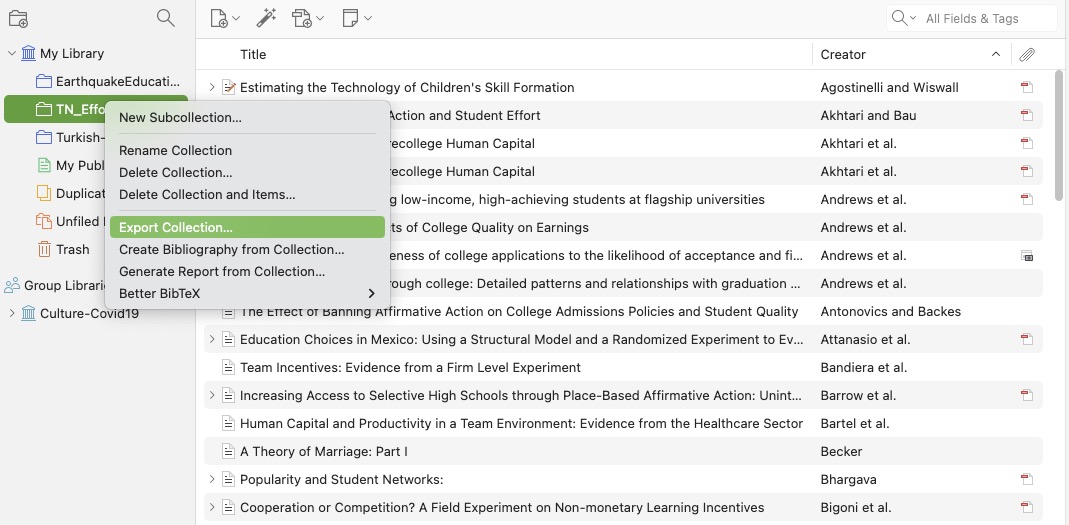
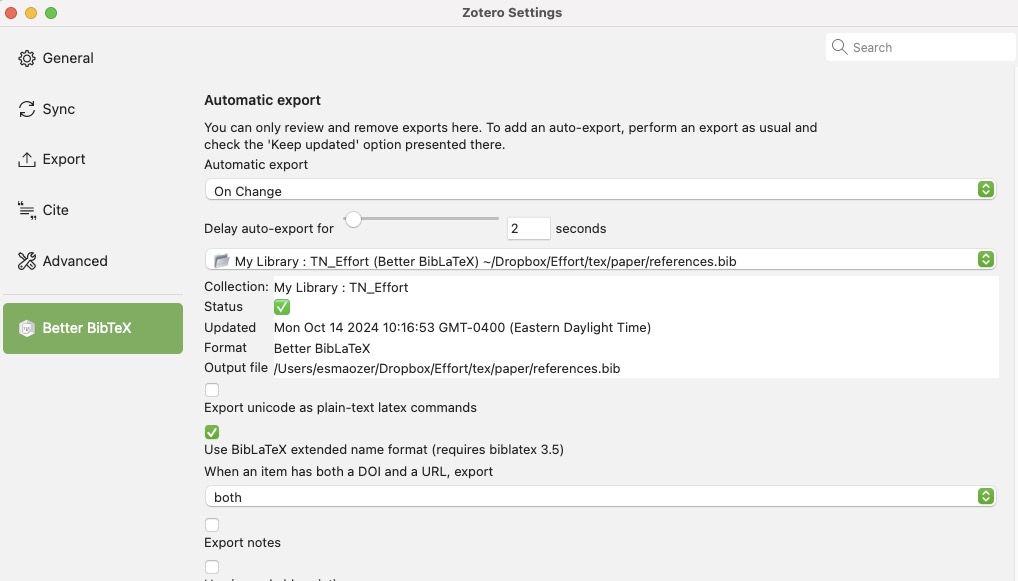
Figure 2: Zotero Automatic BibTex Export
4. GitHub Copilot When I first started using it, I was amazed by GitHub Copilot’s ability to complete sentences. It’s not just random auto-completion; it considers the context of your previous and future writing to provide relevant suggestions. While it’s great, it can be distracting and make you lose track of what you planned to write. You can experiment with it, and if you don’t want AI to override your writing autonomy, you can turn off auto-completion by clicking on the Copilot icon in the bottom right corner of VS Code to disable it.
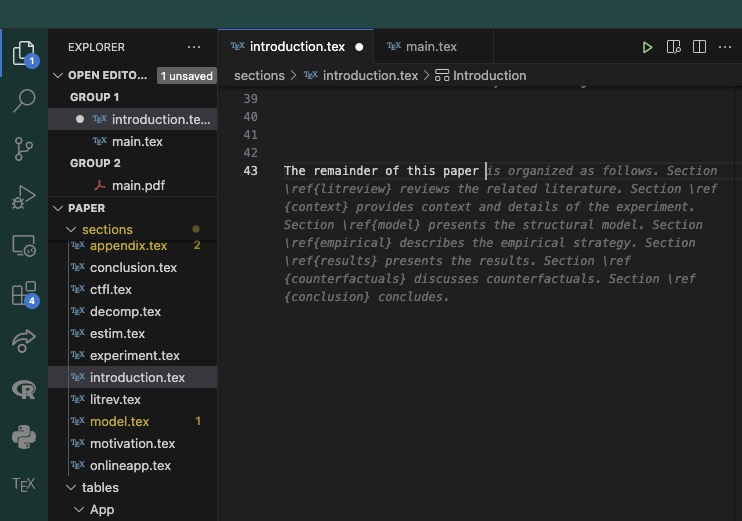
Figure 3: Copilot Auto Completion
5. Shortcuts I really like using/creating shortcuts and using the Snippet window if needed. The snippet window is shown below.

Figure 4: LaTeX Workshop Snippet View
GitHub Copilot and Other GenAI
As noted above, GitHub Copilot is excellent for code completions and fixes. Additionally, the chat box almost eliminates the need to open a new window for GenAI use.
Note that using GitHub Copilot requires a GitHub Pro account, which I get for free using my Penn State account. You should check if you are eligible for a similar benefit.
One great feature of Copilot is that you can open a Jupyter notebook and ask for inline help by pressing Cmd+I. For example, you can type a query like “How to run a Mann-Whitney U test?” and you will see a step-by-step guide appear in your cell.
Another advantage is that you are not limited to GPT models. In Copilot, you can choose which model to use. The available options are shown in the screenshots below.

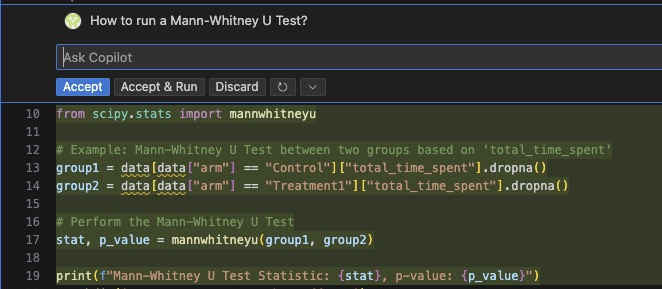
Figure 5: GitHub Copilot - Code Assistance
While writing this, DeepSeek is not available, but open-source models can save you when you don’t have an internet connection. GitHub Copilot requires an internet connection, but using Llama 3.1 and DeepSeek does not (although they are constrained to smaller models).
Not exactly the same as Copilot functionality, but you can ask for help without waiting to land.
First, you need to install the open-source model you plan to use. I installed both Llama 3.1 and DeepSeek since I wanted to compare their performance for a task in one of my projects. I installed them using Ollama. (You can download the DeepSeek Chat app as well, which will work offline.) After installing, the only thing to do is to call it in the Terminal (I do it within VS Code). Please see the screenshots below for examples.
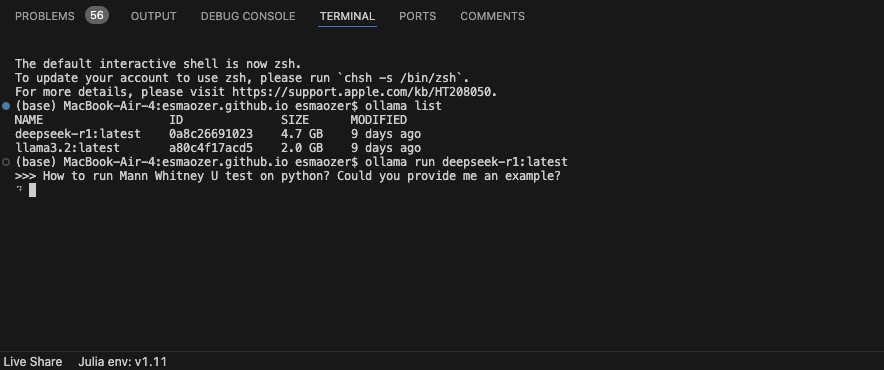
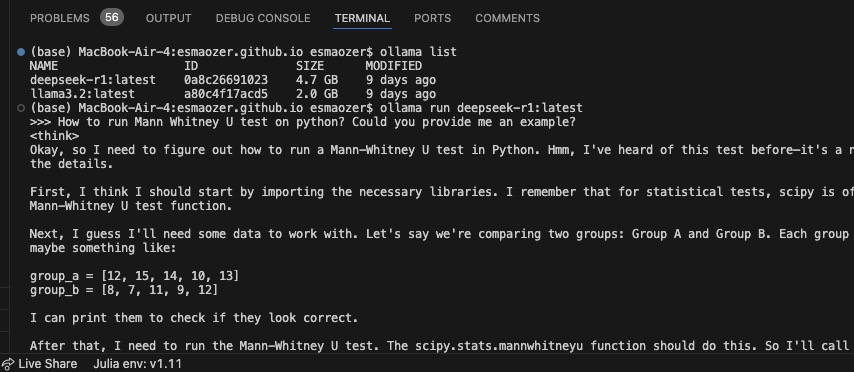
Figure 6: DeepSeek - Local Execution
Managing a Git Repository
While using GitHub for version control is still not very common among economists, it is essential for collaborative work that requires version control. Dropbox is great for data/code storage and sharing, and while it can provide some visibility into ‘who did what’ it’s not as detailed or easy to track as Git. We can use both interlinked. For example, you can’t pull/push large files in Git, but you can call them from the Dropbox folder when needed. (I’ve gained some experience with this while working as an RA for Michael Gechter and Nick Tsivanidis.)
Suppose you’re working on a Git project, and you open a Python file in VS Code. You’ll see the fork icon on the left bar. You can quickly pull, commit/push, and resolve conflicts, as shown below.
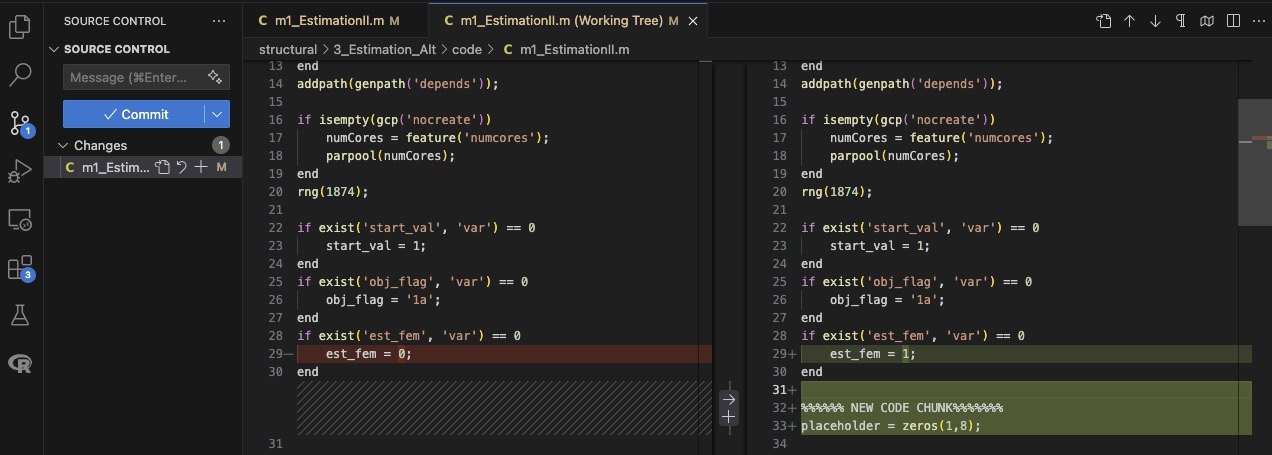
Figure 7: Git Repository - Version Control
Other Tips
Find in Files: Suppose you defined a parameter in one of your scripts and then used it in many other scripts without re-defining it. Now, you forget which script you exactly defined it in but need to double-check its value. Rather than going through the files one by one, you can just use the VS Code Find-in-Files functionality.
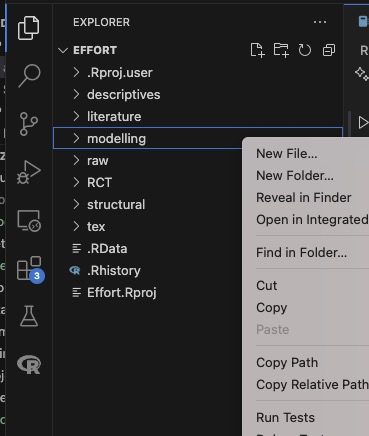
Figure 8: Find in Files - an Example
Multi-Cursor Editing:
Like some other IDEs, VS Code also has a multi-cursor feature. You can edit multiple lines at once by holding down the Alt (Windows/Linux) or Option (Mac) key and clicking on the lines you want to edit. Below is an example of how I used this feature to add a new line of code to multiple lines at once.
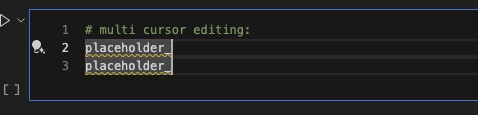
Figure 9: Multi-Cursor Editing
What to Explore Next?
Apart from the topics listed above, what other tools can economists learn/discover to boost their productivity using VS Code? Here are some that come to mind but which I haven’t explored enough to use confidently:
- Connecting to SSH Environments: Until now, I’ve used supercomputers following the procedure mentioned in my other post. Next, I’ll integrate my SSH workflow into VS Code.
- Connecting to Your Database: Given that economists use high-frequency data, some projects might require us to connect to a cloud database. I haven’t tried this yet but I will work on this soon for my project where I created a website and the data is stored in a cloud database.
- LiveShare: This built-in VS Code feature allows more than one person to work on the same script/document. It becomes handy when a bug can’t be debugged easily, and you need external help. I’ve tried it several times, but it might be more useful than I initially thought.
I hope you find this guide useful1, and I’d be happy to hear/learn about how you use VS Code in your economics projects.
Special thanks to my husband, M. Zahid Ozturk, for his encouragement in using these tools, and to Yaming Chang — our conversation helped me realize the value of writing this guide. ↩︎
- Posted on:
- February 10, 2025
- Length:
- 12 minute read, 2430 words
- See Also: